Auszüge aus der Webseite von Gerrit:
The Replikon is a design for a back loaded horn enclosure for the Fostex FE208∑ driver.
On their DIY site Hornlautsprecher.de, Till Römer and Raffi Bauer published a simplified version of their commercial design.
I decided to give it a try as I am very much interested the 'resonance method' developed by Raffi & Till.
There are a some things I would like to change and a few things I would like to add:
- Round of the edges at the hornthroat.
- Fill the two hollow spaces with fine sand.
- Add extra panels to the back to create a sandwich panel (sand filled).
- Add extra pieces of wood to the oustide of the enclosure (at the top).
- Countersink the driver and round of the edge on the inside.
I posted some of these ideas on the diyAudio forum in the hope that one of the designers would comment on them. Till Römhild was so kind to do so, he confirmed that the proposed tweaks would be a good idea.
The result
Here's the finished enclosure:
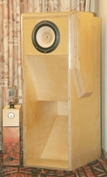
Just the woodwork weighs 50.5Kg, furthermore each enclosure contains about 35Kg of fine sand.
Tuning
Key to the resonance method is the correct tuning of the back chamber volume to the amplifier and room. At first I tried stacking magazines to reduce the volume but I found this method to be quite cumbersome. So this is what I came up with:
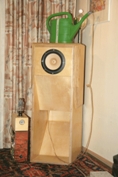
The watering can on the top contains 8L water. It is connected via some tubing to a beach ball inside the enclosure.
By releasing the cothpins water will flow into the beach ball, thus reducing the internal volume.
So does it work? Yes it does! It is almost like focussing a camera, at a certain point (which I was able to reproduce)
the soundstage opens up and the loudspeakers and walls seem to dissapear. Quite amazing.
One can also hear if the volumes for the left and right channel are not equal.
Raffi & Till also mention that a correct tuning will remove harshness in the sound.
I also found this to be the case. While listening to Debut by Björk there was a certain harshness in the vocals, this dissapeared after correct tuning.
Same goes for Shirley Bassey on The Rythm Devine by Yello.
Construction
At first glance the design looks rather simple but this is not the case. The problem lies in creating rigid joints.
The joints in the enclosure are, for the most part, inherently weak.
To remedy this situation I plan on using wood dowels to strenghten the joints where possible.
The dowels will be spaced 3.2cm apart (3.2cm is a European standard distance for holes for cabinet making).
Because of the large amount of dowels used I will not try the traditional method of dowelling but drill the holes through the panels.
Making a 'blind' doweljoint will work if you use 5 dowels or so, but not with 100.
The dowels are longer than the depth of the hole, the part that sticks out
can be cut with a Japanese style saw to create a perfectly flat finish.
I decided to use 21mm birchply for the enclosure (22mm was not available)
so the dimensions had to be adjusted slightly.
For two enclosures 3 sheets (122cm x 244cm ) are needed.
As these are almost impossible to handle by one person (50Kg per sheet) I had them precut:
ten panels of 35cm x 122cm and 4 panels of 122cm x 54.8cm.
Cutting those panels to size is not really a problem with the tools I have.
A first test to see if the parts fit:

The parts are placed on a side panel without any support.
Here is a picture of the dowelling jig I used:

With this it is easy to get a neat row of dowels:
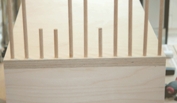
11 dowels (8mm diameter, 5cm long) to connect 35cm wide panels, in this case the back and bottom panels.
Joining the pieces for the inside:
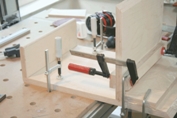
Above you see the bottom part of the compression chamber being glued to the back part.
Because this joint is very weak I added two pieces to strengthen the joint.
Additional pieces:
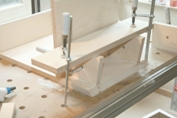
The two pieces add strength and make it a lot easier to align the next piece:
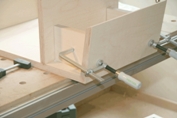
The bottom panel can now be clamped in the correct position. When using wood glue, the pieces should be pressed together with a force of 5Kg/cm2. For the simplest butt-joint (21mm x 35cm = 73.5cm2) this results in a clamping force of 367 Kg !!
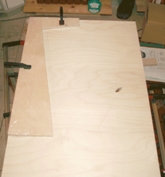
Glueing the inner part in place:
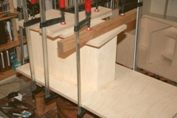
Adding the front panel:
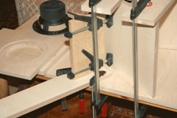
I fabricated a little piece to aid in the clamping of this part.
Here you see the extra panel for the back of the enclosure and how it is glued to the back panel:
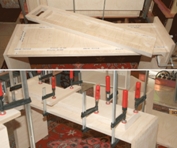
The back panel has three 16mm holes to allow for the sand to flow into the wedge.
Together these hollow spaces should contain about 15L of sand.
The height if the back panel should help to compact the sand in the wedge.
The next step is to glue this part to the side:

As you can see the panel for the driver is still missing.
It will be cut to size last to create a tight fit.
Pressing the panel for the bottom wedge into place:
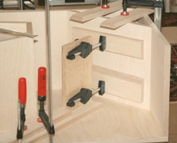
The panel for the driver:

A lot of effort went into these two panels.
There is less than 0.5mm play when the driver is dropped into place.
The proper way of inserting the threaded screws:
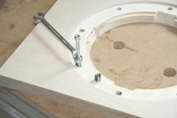
Use a wrench and a bolt to insert the screw.
The slits are for taking them out, never use a screwdriver to insert them.
You will ruin the thread.
The driver frames are dampened with duct sealant:
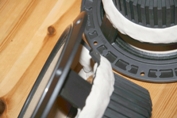
Each driver has 250g of sealant attached to the frame.
Thanks to Dave (planet10) for this tip.
Side view of the enclosure:
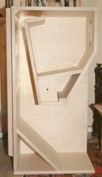
Clamping on the second side panel:
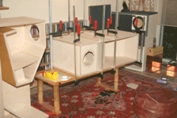
In the background you can see the current enclosure, a back loaded horn according to Schmacks.
View from the top:
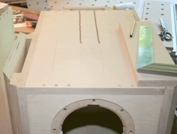
Note the additional side panels and the grooves for the wiring.
Ready for some serious sanding:
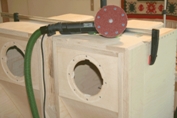
It took me about three hours, including the breaks for machine and operator, to get from the above to this:
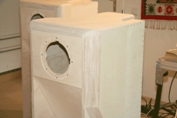
Now all that's needed is some varnish.